Friday, May 10, 2013
LakeNormanMommies: Fitness Friday: Creating an Injury-Free Body
LakeNormanMommies: Fitness Friday: Creating an Injury-Free Body: Creating an Injury-Free Body So you have decided to get in shape and have started exercising but your knee is bothering you, or maybe your...
Friday, April 19, 2013
LakeNormanMommies: Fitness Friday: Choosing the Right Exercise Routin...
LakeNormanMommies: Fitness Friday: Choosing the Right Exercise Routin...: Choosing The Right Exercise Routine Made Easy Whether you are just starting back to exercise after time off or exercising for the very fi...
Check out my post on Lake Norman Mommies!
Check out my post on Lake Norman Mommies!
Thursday, March 28, 2013
Create a Pain Free and Strong Body
I had written this article for City Unwrapped Magazine but wanted to share it with everyone here as well. Hope you find this helpful!
It seems that I run across people complaining of knee pain, shoulder pain, or neck and back pain more than ever these days. When I start to examine the cause it usually stems from improper alignment while doing exercises or day to day activities. My goal as a Pilates Instructor is to teach individuals how to correct and prevent pain or to keep it from happening at all.
Sitting Straight Does Make a Difference
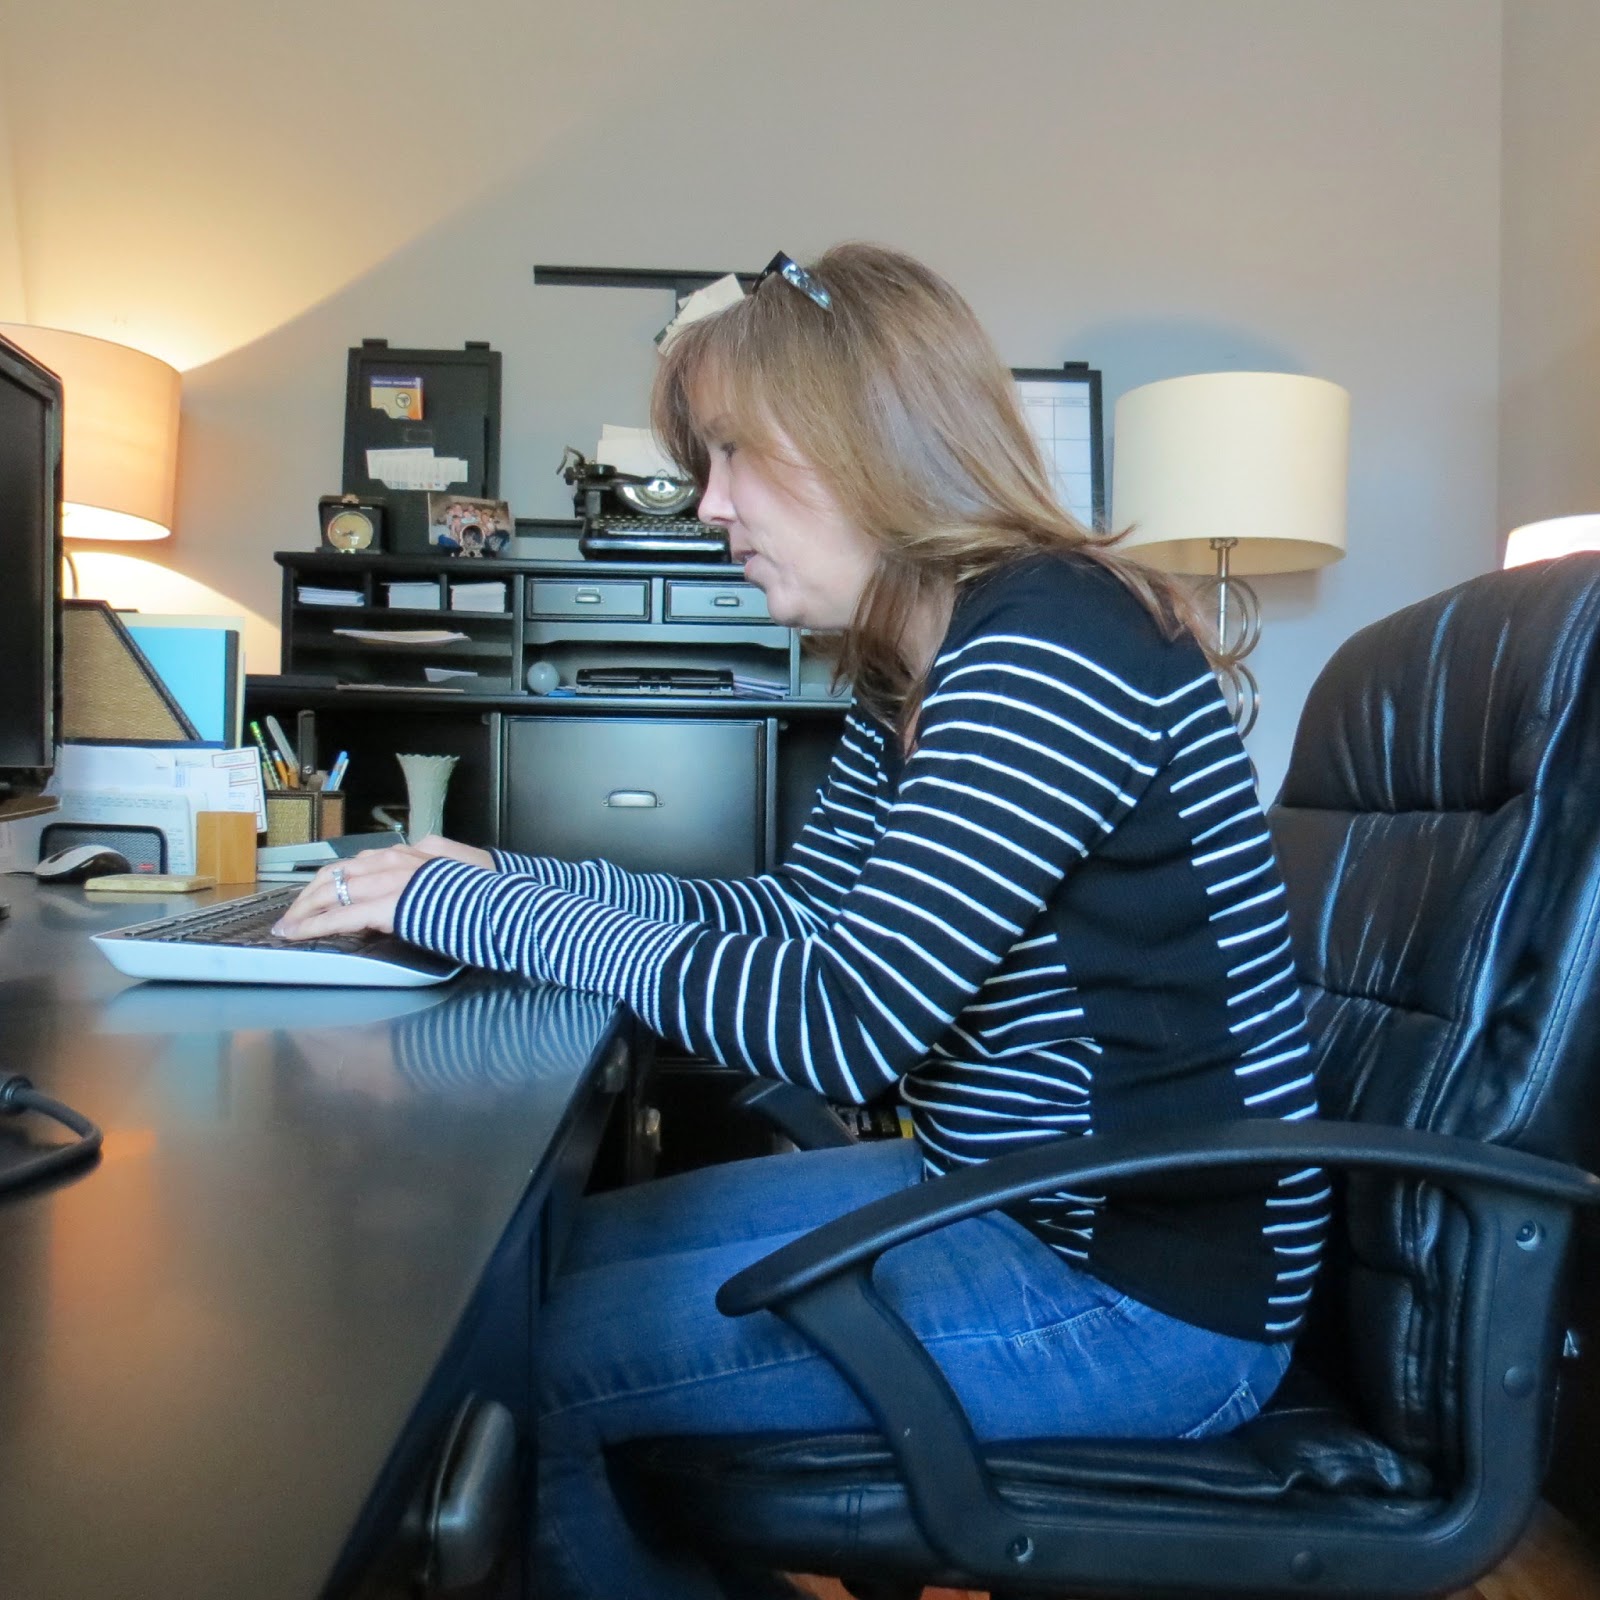
With all the time we spend on the computer, in our cars, sitting behind a desk, etc. we need to start paying attention to how our bodies are working while doing those routine tasks. I find most people slump over their computers or steering wheels and settle their bodies into a place that causes undue stress on the back, neck and shoulders. Just making a few adjustments to how we sit can help build a stronger foundation and take the pressure off these areas. While sitting in a chair take note where the torso aligns over the hips and sitz bones. If the tail bone is tucked under your body and the frame of the torso (back ribcage) is behind the hips you are putting too much stress on the lumbar spine and the internal organs. This pressure over time will cause a weakened core and create poor posture as well as low back pain. Just sitting up taller and opening the tail bone to the back of the chair will bring the torso more in line to sit on the frame of the pelvis and hips which creates more stability. Also don’t forget to activate the internal core muscles to help strengthen the back as well. When our mothers told us to stop slouching and sit up straight we should have listened!
Be Aware Of Your Shoulders
Next, when sitting while working or eating we tend to slump over and round the shoulders and upper back which again will put undue pressure on the neck and upper back. This poor posture will literally be a pain in the neck if not corrected. Instead of rounding the upper body, sit tall with an open tail bone and hinge forward through the hip crease to lean towards the desk or table. Always think shoulders back and down (I know it sounds funny but I tell my clients “heavy armpits, shoulders loose” and it works!) Just being aware of where our bodies are sitting will make a huge difference in how we feel at the end of the day. At first this may be hard to remember but stick with it!
Proper Alignment During Exercise is Key
Of course the way we exercise can cause just as many issues if we do not think about where our bodies are lined up. These days of the ‘extreme’ boot camps and fast paced routines we do not allow ourselves to make sure we align our neck, knees, and shoulders in the right place. One of the most common positions I see executed poorly is the all 4 balance and plank position. To set up properly in the all 4 position make sure that your wrists line up under your shoulders and knees line up under the hips. Have someone help spot you a few times so that you start to “feel” the correct position. Most people line up where it is comfortable not necessarily in the correct place. Having the arms and knees in the proper place
creates a strong base that will help to stabilize the body better when you balance or come into plank. Keep the head in line with the spine and soften through the shoulders and upper back. I see numerous people that round too much here and keep their head either too high or too low which puts too much pressure on the neck. If you can, have someone place a foam roller or yard stick lined up down your spine running from the back of the head to the tail bone making sure all parts of the back and head touch the roller. Once the body is positioned correctly you have created a strong base ready for anything!
Remember, take care of your body, it’s the only one you get!
It seems that I run across people complaining of knee pain, shoulder pain, or neck and back pain more than ever these days. When I start to examine the cause it usually stems from improper alignment while doing exercises or day to day activities. My goal as a Pilates Instructor is to teach individuals how to correct and prevent pain or to keep it from happening at all.
Sitting Straight Does Make a Difference
 |
| Poor computer posture. |
 |
| This is better! |
Next, when sitting while working or eating we tend to slump over and round the shoulders and upper back which again will put undue pressure on the neck and upper back. This poor posture will literally be a pain in the neck if not corrected. Instead of rounding the upper body, sit tall with an open tail bone and hinge forward through the hip crease to lean towards the desk or table. Always think shoulders back and down (I know it sounds funny but I tell my clients “heavy armpits, shoulders loose” and it works!) Just being aware of where our bodies are sitting will make a huge difference in how we feel at the end of the day. At first this may be hard to remember but stick with it!
Proper Alignment During Exercise is Key
 | |
| Improper alignment in the all 4's position. |
 |
| Much better, stable base! |
creates a strong base that will help to stabilize the body better when you balance or come into plank. Keep the head in line with the spine and soften through the shoulders and upper back. I see numerous people that round too much here and keep their head either too high or too low which puts too much pressure on the neck. If you can, have someone place a foam roller or yard stick lined up down your spine running from the back of the head to the tail bone making sure all parts of the back and head touch the roller. Once the body is positioned correctly you have created a strong base ready for anything!
Remember, take care of your body, it’s the only one you get!
Wednesday, March 27, 2013
Certified Pilates Instructor Needed!
Dancing Moon Pilates is looking for a Comprehensive Certified Pilates Instructor. Qualified candidates must submit a resume and will be asked to teach a session to the owners. Having experience on Balanced Body equipment is preferred. Call or email for more details!
Wednesday Blues
Today was a long day and I just kept telling myself Friday will be here soon! We are heading to Disney for spring break and can't wait to take youngest to see all the sites.
 In my quest to get everything done, organized, and clean before we leave I have been in DIY overload. One of my most recent fun DIY projects came out of my need to turn a broken item into something useful. I had purchased 2 hanging wall candle holders from Kohl's several weeks ago. In one I added some shells found on vacation last year in Maine with a candle. The other must have gotten a crack in the top glass and the whole top handle came off in my hands. I never got around to taking it back to the store and I decided to do something with it.
The the way it's suppose to be used!

The top that came off the other one. I have a use for this part in another DIY project...stay tuned!
I have been inspired by all the terrariums on Pinterest and in stores and wanted to try doing one myself so I decided to use the broken candle holder. On one of my walks around the neighborhood I picked up a large piece of River Birch bark laying in the park and thought "I can use this for something".

The large piece of bark that gave me the idea. I found more in my back yard from my River Birch tree.

When I was in Home Depot I saw they had their succulents buy 5 get one free and bought one of each type. Using the bottom part of the candle holder I filled it with dirt and added the plants.

I wanted to cover the bottom part of the glass with the bark to hide some of the dirt and used a hot glue gun to adhere the bark.

All finished! I loved the way it turned out. I placed this on the table in my front entry way. I am making more with bark I found at my friend Laurie's house and some $2.00 vases I found at Habitat. Anybody want one?
In my quest to get everything done, organized, and clean before we leave I have been in DIY overload. One of my most recent fun DIY projects came out of my need to turn a broken item into something useful. I had purchased 2 hanging wall candle holders from Kohl's several weeks ago. In one I added some shells found on vacation last year in Maine with a candle. The other must have gotten a crack in the top glass and the whole top handle came off in my hands. I never got around to taking it back to the store and I decided to do something with it. The the way it's suppose to be used!
The top that came off the other one. I have a use for this part in another DIY project...stay tuned!
I have been inspired by all the terrariums on Pinterest and in stores and wanted to try doing one myself so I decided to use the broken candle holder. On one of my walks around the neighborhood I picked up a large piece of River Birch bark laying in the park and thought "I can use this for something".
The large piece of bark that gave me the idea. I found more in my back yard from my River Birch tree.
When I was in Home Depot I saw they had their succulents buy 5 get one free and bought one of each type. Using the bottom part of the candle holder I filled it with dirt and added the plants.
I wanted to cover the bottom part of the glass with the bark to hide some of the dirt and used a hot glue gun to adhere the bark.
All finished! I loved the way it turned out. I placed this on the table in my front entry way. I am making more with bark I found at my friend Laurie's house and some $2.00 vases I found at Habitat. Anybody want one?
Tuesday, March 19, 2013
Skinny Chicken Salad...Yum


If you have never had a garden before give it a try, it's fun and so satisfying when you get to eat that first tomato, bean or pepper. Make sure you start with good organic compost or garden soil!
Here is Tuesday's Recipe!
I ran across this recipe on Pinterest. It is very close to the way I have made chicken salad for years so I had to check it out. The biggest difference is adding Greek Yogurt instead of the mayo and the cranberries. It's yummy!Harvest Chicken Salad
Recipe by Chung-Ah of Damn Delicious

Ingredients:
- 1 pound chicken breast (chopped, diced, or shredded)
- 1/2 cup diced red onion
- 1/2 cup diced apple
- 2/3 cup grapes, halved
- 1/3 cup Dried Cranberries
- 1/4 cup sliced almonds
- 1/2 cup Greek yogurt
- 1 1/2 TBSP freshly squeezed lemon juice
- 1/2 tsp garlic powder
- Kosher salt and freshly ground black pepper, to taste
- Ciabatta bread, toasted, for serving
Directions:
In a large bowl, combine chicken, red onion, apple, grapes, cranberries, sliced almonds, Greek yogurt, lemon juice, garlic powder, salt and pepper, to taste. Serve sandwiches on ciabatta bread with chicken salad mixture.
In a large bowl, combine chicken, red onion, apple, grapes, cranberries, sliced almonds, Greek yogurt, lemon juice, garlic powder, salt and pepper, to taste. Serve sandwiches on ciabatta bread with chicken salad mixture.
Note: You can also serve this over baby spinach for a delicious lunch salad!
Monday, March 18, 2013
Happy Monday!
Hope everyone got out and enjoyed the awesome weekend. I worked in the garden all weekend and can't wait for the veggies to come in!
Don't forget our Magic Circle Master class is this Saturday at 10:00, call for more details or to sign up for class.

Don't forget our Magic Circle Master class is this Saturday at 10:00, call for more details or to sign up for class.
Thursday, March 14, 2013
DIY Painted Curtains
I'm still on my quest to remodel rooms one by one. Currently I am changing my Kitchen and Breakfast area. I decided that I wanted to get rid of the table and chairs in our bay window/breakfast area and turn it into a cozy room to have coffee and read the paper. The curtains in the bay window had been purchased at Target several months ago just to have something on the windows. Since I was not sure at the time how the room would evolve I bought very cheap ($10-15 a panel) off white curtains that would go with anything. Once I got all the furniture in the area the way I wanted the curtains just were not doing it for me anymore. I could not find any fabric that I really liked and did not want to spend more money on ready made curtains, so I go the brilliant idea to paint the curtains I had.
I went to the craft store and bought some acrylic paint in red, yellow, black and cream. I ran across some foam stamps that I had bought years ago and thought the patterns would work well for my cozy room. I played with colors and stamps on some drawing paper to give me some ideas of what I thought may work before putting anything on the actual curtains. Once I felt ready to start I laid out a large cutting board on a flat surface, mixed the paint on some plastic plates and started applying paint to the stamps and started the pattern.


Success! Continue until you have the pattern, and colors you are looking for. Let the curtains dry before hanging them back up. The acrylic paint does not take long to dry. I was able to finish and hang 5 panels in just a few hours. The paint cost about $5.00 a jar. I love how they turned out and now I have original curtains for around $20.00.

 |
| The curtain panels before. |
 |
| The curtain panels after. |
I went to the craft store and bought some acrylic paint in red, yellow, black and cream. I ran across some foam stamps that I had bought years ago and thought the patterns would work well for my cozy room. I played with colors and stamps on some drawing paper to give me some ideas of what I thought may work before putting anything on the actual curtains. Once I felt ready to start I laid out a large cutting board on a flat surface, mixed the paint on some plastic plates and started applying paint to the stamps and started the pattern.
My husband thought I have bought big jars of Ketchup and Mustard!
Everything ready to go, the first stamps went on well.
Make sure you cover the stamp with paint, I used a small artist brush to apply the paint. Be careful not to get the paint in the creases or it will show when you press down.
Apply a little pressure, not too hard, and carefully lift the stamp off the fabric.
Success! Continue until you have the pattern, and colors you are looking for. Let the curtains dry before hanging them back up. The acrylic paint does not take long to dry. I was able to finish and hang 5 panels in just a few hours. The paint cost about $5.00 a jar. I love how they turned out and now I have original curtains for around $20.00.
Wednesday, March 13, 2013
Yummy Tacos
Here is a yummy and healthy recipe! Enjoy!
Roasted Veg Tacos with Avocado Cream and Feta

Serves: 2
Ingredients
- Filling:
- 1 small zucchini, diced
- 1 small summer squash, diced
- ½ medium red onion, diced
- 1 ear sweet corn, removed from cob
- 1 cup cherry tomatoes, sliced in half
- 1 medium red pepper, diced
- 2 tablespoons olive oil
- 2 cloves garlic, minced
- 2 teaspoons cumin
- ¼ teaspoon salt
- Avocado Cream:
- 1 ripe avocado
- ⅓ cup full fat, plain greek yogurt
- ¼ cup cilantro
- 1 tablespoons lime juice
- Everything Else:
- Feta or Goat Cheese
- 4-6 corn tortillas
- Extra cilantro
Instructions
- Preheat oven to 400˚. Prepare all the veggies as described and toss with olive oil, minced garlic, salt, and cumin. Roast until tender and lightly browning.
- While veggies are roasting, whip together avocado, greek yogurt, cilantro, and lime juice.
- To assemble tacos, warm up tortillas (in the microwave wrapped in a damp paper towel or a oven with a damp tea towel) and assemble with roasted veggies, avocado cream, and a sprinkle of feta.
Monday, March 11, 2013
It's Monday and I'm Back!
Yes it has been awhile. My husband and I both had bronchitis and my youngest had a cold for most of February. The older I get the harder it is to shake a sickness and the less energy I have to work through it. I turned 51 last week and realized that time has passed too quickly this year..is it March already?
Anyway I have been busy and have lots to share this week! For today remember....

Anyway I have been busy and have lots to share this week! For today remember....
Tuesday, January 29, 2013
What's Cooking Tuesday Tasty Side Dish
This is a good side dish that will go with just about anything, but try a pan roasted
Red Snapper or an Oven Roasted Whole Chicken!
ROASTED BROCCOLI WITH GARLIC AND RED PEPPER
Adapted from Bon Appétit
Adapted from Bon Appétit

INGREDIENTS
1 1/2 pounds broccoli
3 large cloves of garlic, finely diced (use 2 cloves for a less garlicky dish)
Dried crushed red pepper (just a pinch if you want a hint of heat or 1/2 to 1 teaspoon if you want a heavy kick)
3 tablespoons oil (I use either olive oil or grapeseed oil)
Salt and Pepper
3 large cloves of garlic, finely diced (use 2 cloves for a less garlicky dish)
Dried crushed red pepper (just a pinch if you want a hint of heat or 1/2 to 1 teaspoon if you want a heavy kick)
3 tablespoons oil (I use either olive oil or grapeseed oil)
Salt and Pepper
INSTRUCTIONS
Preheat oven to 450 F. Separate the broccoli into small, individual florets. The smaller the florets, the crispier they get in the oven. Toss the broccoli well with two tablespoons of oil and spread on a baking sheet. Make sure the broccoli is spread out in one layer as you want each floret to have room to brown. Place the pan in the middle of the oven and roast for 10 minutes.
Preheat oven to 450 F. Separate the broccoli into small, individual florets. The smaller the florets, the crispier they get in the oven. Toss the broccoli well with two tablespoons of oil and spread on a baking sheet. Make sure the broccoli is spread out in one layer as you want each floret to have room to brown. Place the pan in the middle of the oven and roast for 10 minutes.
While broccoli is baking, finely dice your garlic
and combine with the remaining tablespoon of oil in a small bowl. Add
desired amount of red pepper flakes to the oil and garlic. Set aside.
After broccoli has baked for 10 minutes, remove
from oven and add the garlic mixture to the broccoli, stirring well to
combine. Make sure the broccoli is again spread out in a single layer
and return to the oven for an additional 8 minutes. Stir the broccoli at
least once to ensure the garlic roasts and browns evenly. Serve
immediately.
Monday, January 28, 2013
Animal Humor
Happy Monday!
These are too cute for words!

So how many of you have done the same thing?!

What a face!
Wednesday, January 23, 2013
Dining Room Remodel
Last week I wrote about my dining room remodel and shared with you the how I reworked the chandelier and hutch. Today I wanted to finish sharing some of my great finds!
I have had this mirror for years, originally getting it from Michael's. I picked out the frame and had it hung on the diagonal just to be different. Not wanting to get rid of it, but so past the gold frame, I decided to paint it the same hammered metal color as the sewing table bases.
The wall color was a combination of different things. I painted over the old green walls with a dark chocolate color that was in the fabric I found. Once I put it on the walls I knew it was too dark and flat and did not have the look I was going for. I found a Valspar Translucent Iridescent Glaze on sale at Lowes for under $6.00 and thought why not. Adding a hint of a taupe color (the one used on the back of the hutch) to the glaze I found a great combination to add to the chocolate walls. Using and old natural sponge and a stipple brush I had in my paint supplies I applied the glaze with the sponge and quickly went over it with the stipple brush to soften it out. Pictures do not do it justice, when you walk into the room the walls shimmer in the light.


Loving the new color of the mirror and how it works with the paint on the walls. I found this file old filing cabinet on one of my Metrolina Antique mall shopping trips. It is from a county court house in Ohio circa 1870. I will admit I did something I normally would not do and splurged on this piece but it was well worth it!

On another Metrolina Antique shopping trip I ran across some old machine part molds and a wooden spoon set. I spent $10.00 on the spoon set and $5.00 on the molds. I knew both would become wall art but was not sure where or how. After some thought I came up with this idea. I bought 2 framed canvases from Michaels for $5.00 and glued some burlap to the frame that I had left over from another project. I attached those to the walls and punched nails through the canvas to place the spoons and molds on. I placed these on either side of the courthouse piece and I am please with how they turned out. Original one of a kind wall art for $10.00 a piece.

At the end of the remodel I spent $20.00 on art for the walls, around $125.00 for all the paint, $25.00 for the hutch, $36.00 for the new chandelier, $45.00 for fabric to cover the chairs and create curtains. I did buy a new rug for $99.00 and traded a old side table for an new side table with my friend Laurie, re-purposed my chairs, old glass table top and old sewing bases. My one splurge cost me $600.00 for the old courthouse cabinet, I do love that piece though! Without that cost I remodeled the whole room with a dramatic new look for under $400.00, not bad considering I have a new dining room table, chairs, china cabinet, side table, wall art, curtains, chandelier and more!
Tuesday, January 22, 2013
Brazilian Shrimp Soup

1 onion, chopped
1 green bell pepper, chopped
3 cloves garlic, minced
3/4 cup long-grain rice
1/4 teaspoon red-pepper flakes
1 3/4 teaspoons salt
1 3/4 cups canned crushed tomatoes in thick puree (from one 15-ounce can)
5 cups water
1 cup canned unsweetened coconut milk
1 1/2 pounds medium shrimp, shelled and cut in half horizontally
1/4 teaspoon fresh-ground black pepper
1 tablespoon lemon juice
1/2 cup chopped fresh parsley or cilantro
In a large pot, heat the oil over moderately low heat. Add the onion, bell pepper, and garlic and cook, stirring occasionally, until the vegetables start to soften, about 10 minutes. Add the rice, red-pepper flakes, salt, tomatoes, and water to the pot. Bring to a boil and cook until the rice is almost tender, about 10 minutes. Stir the coconut milk into the soup. Bring back to a simmer and then stir in the shrimp. Simmer, stirring occasionally, until the shrimp are just done, 3 to 5 minutes. Stir in the black pepper, lemon juice, and parsley.
Notes Variation Instead of the shrimp, use one pound of boneless, skinless chicken breasts (about three), cut crosswise into quarter-inch strips. Cook for the same amount of time.
Monday, January 21, 2013
Crazy Monday and Kitchen Chaos!
I know I have missed a few days but life has been hectic! We are in the middle of a kitchen island makeover and I have been without a sink or counter top for almost a week now. Today we washed dishes in the tub and sink upstairs...not really a fun thing. I keep telling myself its all for the greater good but I am not a person that can handle a disorganized house for too long without going crazy! I promise to get back on track this week...unless the counter top does not get installed soon!

Also, check out our new class schedule and the addition of Yoga starting next week! We have some great new classes and offer something for everyone, classes start at $10.00 a session for Mat, Yoga and Piloxing and go up to $20.00 for all the Equipment classes.

That's so me!
Also, check out our new class schedule and the addition of Yoga starting next week! We have some great new classes and offer something for everyone, classes start at $10.00 a session for Mat, Yoga and Piloxing and go up to $20.00 for all the Equipment classes.
Wednesday, January 16, 2013
DIY Dinning Room Table and Hutch
There are a few rooms left in my house that have not been 'decorated' yet. I just threw them together with the furniture, etc. that I had either inherited or my husband and I had when we combined homes. When I retired from teaching this May I vowed to 'finish' all those rooms and make them my own. The first room I tackled was my dinning room. I did not have a lot of money to spend so it had to be thrifty and I really wanted to use some of the pieces I already had in the house, but I also wanted a dramatic new look.
With a little paint and hard work I re-decorated the whole room for around $200.00. Below I will share some the things that went into the new decor and will reveal the new room next week!


The room before with a hodge podge of stuff. The green walls were there when we moved in, the table and chairs were inherited from my aunt, and the curtains were re-purposed from my old house.
I knew I wanted a hutch and buffet to hold all my grandmothers china and milk glass pieces but I did not want to spend a fortune. My greatest thrift store find was the hutch top at Habitat for $25.00. It was in excellent shape but missing a glass shelve. The inside light still worked and I loved the detail inside. I already had the buffet base, the piece had been sitting in my entry way. The hutch top fit perfect on top of the base so I painted it a gloss black on the outside and painted the interior a taupe color to match the fabric I was using. I took off the hardware that was a brass finish and spray painted it silver to match the hardware that was on the buffet base. Once the hutch was finished no one could tell the pieces did not come together.


Next I had to decide what to do about the table. In our basement we had two old sewing bases that had belonged to my husband's grandmother. They were a little rusty but in good shape. I found a hammered metal spray paint and painted the bases and added an old glass table top I had bought over 15 years ago at an after market sale. For the cost of 4 bottles of spray paint we had a new dinning room table and I re-purposed 3 items in our house. The chairs had been part of the dinning set my aunt had left me and I painted them black and recovered them with the fabric I had picked out.

 Chair before, not really my taste but my aunt did love animal prints!
Next week I will show you my new chandelier that cost under $40.00, my original wall art, and the finished product!
Take a look at what you have, always be on the look out for good finds, and be creative!
With a little paint and hard work I re-decorated the whole room for around $200.00. Below I will share some the things that went into the new decor and will reveal the new room next week!
The room before with a hodge podge of stuff. The green walls were there when we moved in, the table and chairs were inherited from my aunt, and the curtains were re-purposed from my old house.
I knew I wanted a hutch and buffet to hold all my grandmothers china and milk glass pieces but I did not want to spend a fortune. My greatest thrift store find was the hutch top at Habitat for $25.00. It was in excellent shape but missing a glass shelve. The inside light still worked and I loved the detail inside. I already had the buffet base, the piece had been sitting in my entry way. The hutch top fit perfect on top of the base so I painted it a gloss black on the outside and painted the interior a taupe color to match the fabric I was using. I took off the hardware that was a brass finish and spray painted it silver to match the hardware that was on the buffet base. Once the hutch was finished no one could tell the pieces did not come together.
Next I had to decide what to do about the table. In our basement we had two old sewing bases that had belonged to my husband's grandmother. They were a little rusty but in good shape. I found a hammered metal spray paint and painted the bases and added an old glass table top I had bought over 15 years ago at an after market sale. For the cost of 4 bottles of spray paint we had a new dinning room table and I re-purposed 3 items in our house. The chairs had been part of the dinning set my aunt had left me and I painted them black and recovered them with the fabric I had picked out.
Next week I will show you my new chandelier that cost under $40.00, my original wall art, and the finished product!
Take a look at what you have, always be on the look out for good finds, and be creative!
Tuesday, January 15, 2013
Cooking With Salmon
Here is a yummy recipe that my husband loves. I served this the other day with some Roasted Yukon Gold Potatoes and Steamed Green Beans with Pancetta and Mushrooms. Try to make sure the pieces of Salmon are of equal thickness to ensure even cooking.
Enjoy!
Salmon Bake With Pecan-Crunch Coating
Ingredients
| * 4 salmon fillets (about 1½ inches thick) | |
| * ¼ teaspoon salt | |
| * ⅛ teaspoon pepper | |
| * 2 tablespoons Dijon mustard | |
| * 2 tablespoons butter or 2 tablespoons margarine, melted | |
| * 1½ tablespoons honey | |
| * ¼ cup soft breadcrumbs | |
| * ¼ cup finely chopped pecans | |
| * 1 tablespoon chopped fresh parsley |

Directions
Sprinkle salmon with salt and pepper; place, skin down, in a lightly greased 11-x7-x1 1/2-inch or 9-inch square baking dish.Combine mustard, butter, and honey; brush over salmon. Combine breadcrumbs, pecans, and parsley; spoon evenly across top of salmon. Bake, uncovered, at 450 for 12-15 minutes or until fish flakes easily when tested with a fork. Garnish, if desired.
Monday, January 14, 2013


Friday, January 11, 2013
Yoga Is Coming To Dancing Moon
 Yoga is coming! We are pleased to announce the addition of Cait Klein to our staff. Cait currently teaches at Davidson College and Gotta Yoga, so you may have seen her around town. Classes will start January 28th and will be offered Monday nights at 7:15 pm and Sunday afternoons at 2:30 pm.
 Our new class schedules are coming soon so stay tuned for some other additions as well as class changes. Our goal is to offer a variety of class types to fit everyone's needs and schedules.
Have a great weekend and we hope to see you at the studio soon!
Thursday, January 10, 2013
FItness Thursday, Weight Training Injuries in Women
I read a recent article from Women's Health about how weight-training injuries have increased 63 percent for women in recent years.
There are many reasons why, such as improper form, not warming up, lack of direction and guidance from a qualified professional...the list is long. What the article talked about was how to prevent injuries from happening. Here are a few:
1. Make sure you warm up the muscles before starting to go too deep into the workout. "Working cold, stiff muscles can lead to sprains and tears," says Morey Kolber, Ph.D., a professor of physical therapy at Nova Southeastern University in Florida. "Warming up increases circulation and improves range of motion, which preps your muscles and joints for action."
2. Experts agree that proper form is the single most important factor in injury prevention. Standing straight, core muscles tight, and knees in line with your second toe, will all help to keep you in the proper form. Work with someone that has been trained professionally to help you understand how to create that posture and help you "feel" where you truly should be in space.
3. Watch your shoulders, make sure they are not taking the brunt of the weight. Keeping the shoulders loose and letting other muscle groups take over is key to a healthy shoulder.
5. Above all slow down, take time to set up the proper form and really feel the internal muscle groups working hard. Don't do too much too soon, which can stress out the joint, ligaments, muscles, etc. Also remember if it does not 'feel right' for your body do not do it, even if you are being told to do it. Talk with your teacher, trainer, etc and let them know what's going on in your body.
There are many reasons why, such as improper form, not warming up, lack of direction and guidance from a qualified professional...the list is long. What the article talked about was how to prevent injuries from happening. Here are a few:
1. Make sure you warm up the muscles before starting to go too deep into the workout. "Working cold, stiff muscles can lead to sprains and tears," says Morey Kolber, Ph.D., a professor of physical therapy at Nova Southeastern University in Florida. "Warming up increases circulation and improves range of motion, which preps your muscles and joints for action."
2. Experts agree that proper form is the single most important factor in injury prevention. Standing straight, core muscles tight, and knees in line with your second toe, will all help to keep you in the proper form. Work with someone that has been trained professionally to help you understand how to create that posture and help you "feel" where you truly should be in space.
3. Watch your shoulders, make sure they are not taking the brunt of the weight. Keeping the shoulders loose and letting other muscle groups take over is key to a healthy shoulder.
4. Do not neglect opposing muscle groups. Many women have imbalances from day to day living
which can make them more prone to
injury, So if you work the chest or front of the body be sure to work the back as well, if you work the bicep make sure you also work the tricep, etc.5. Above all slow down, take time to set up the proper form and really feel the internal muscle groups working hard. Don't do too much too soon, which can stress out the joint, ligaments, muscles, etc. Also remember if it does not 'feel right' for your body do not do it, even if you are being told to do it. Talk with your teacher, trainer, etc and let them know what's going on in your body.
Wednesday, January 9, 2013
Wednesday DIY from the House of 34 blog
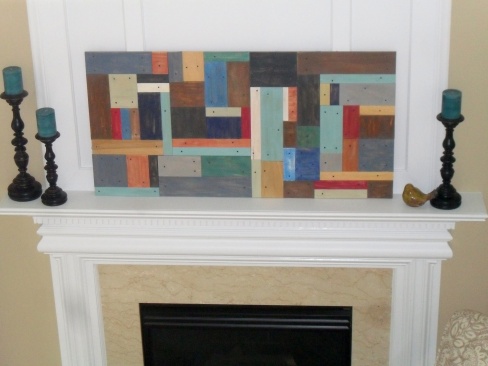
I found this Pottery Barn knock off DIY on my friend Laurie's blog. It just shows you can have some fun with the left over wood you may accumulate from other projects!
Pottery Barn Knock-Off Wall Art
I love Pottery Barn.
I don’t always love the prices. While flipping through the recent
catalog I saw this rustic wood wall art. A whooping $399.00! Knowing I
have a pile of scrap wood in the garage, I just about did the happy
dance at the project I knew I was going to tackle. I love power tools.
I love wood!
I bought a 2x 4 foot piece of plywood, a few
extra pieces of wood, a couple of sample size paint jars, and some
tacks. It only cost around $40.00! Everything else I had… a lot of
wood pieces, glue and leftover paint. Most of the wood I used is
considered “craft” wood. It comes in short lengths and is thinner than
regular wood. I did combine it with “regular” wood though. It gives
the piece some dimension.

Pottery Barn $399.00. Laurie $40.00!

The design was not planned. I cut each
piece as I went along. HINT: When you have the layout you want, take a
picture of it. Just in case you mess up the design later on while you
are painting the wood pieces. You don’t want to spend HOURS and HOURS
trying to put the thing back together, only to remember you DO have a
picture you could have looked at. By that point, bad words may have
been said, drinks may have been drunk, and your family may be afraid to
be in the same room as you. Just saying it could happen. 

The next step was paint.

I applied the paint with a cut up old t-shirt. That way I could rub the
paint on like a stain allowing the wood grain to show through.


The Vodka is for weight, not for drinking. At least not in that moment anyway. After all the pieces were glued down, I distressed each piece with sand paper to lighten the paint colors and to give it a worn out look.

I found these tacks at Lowes.
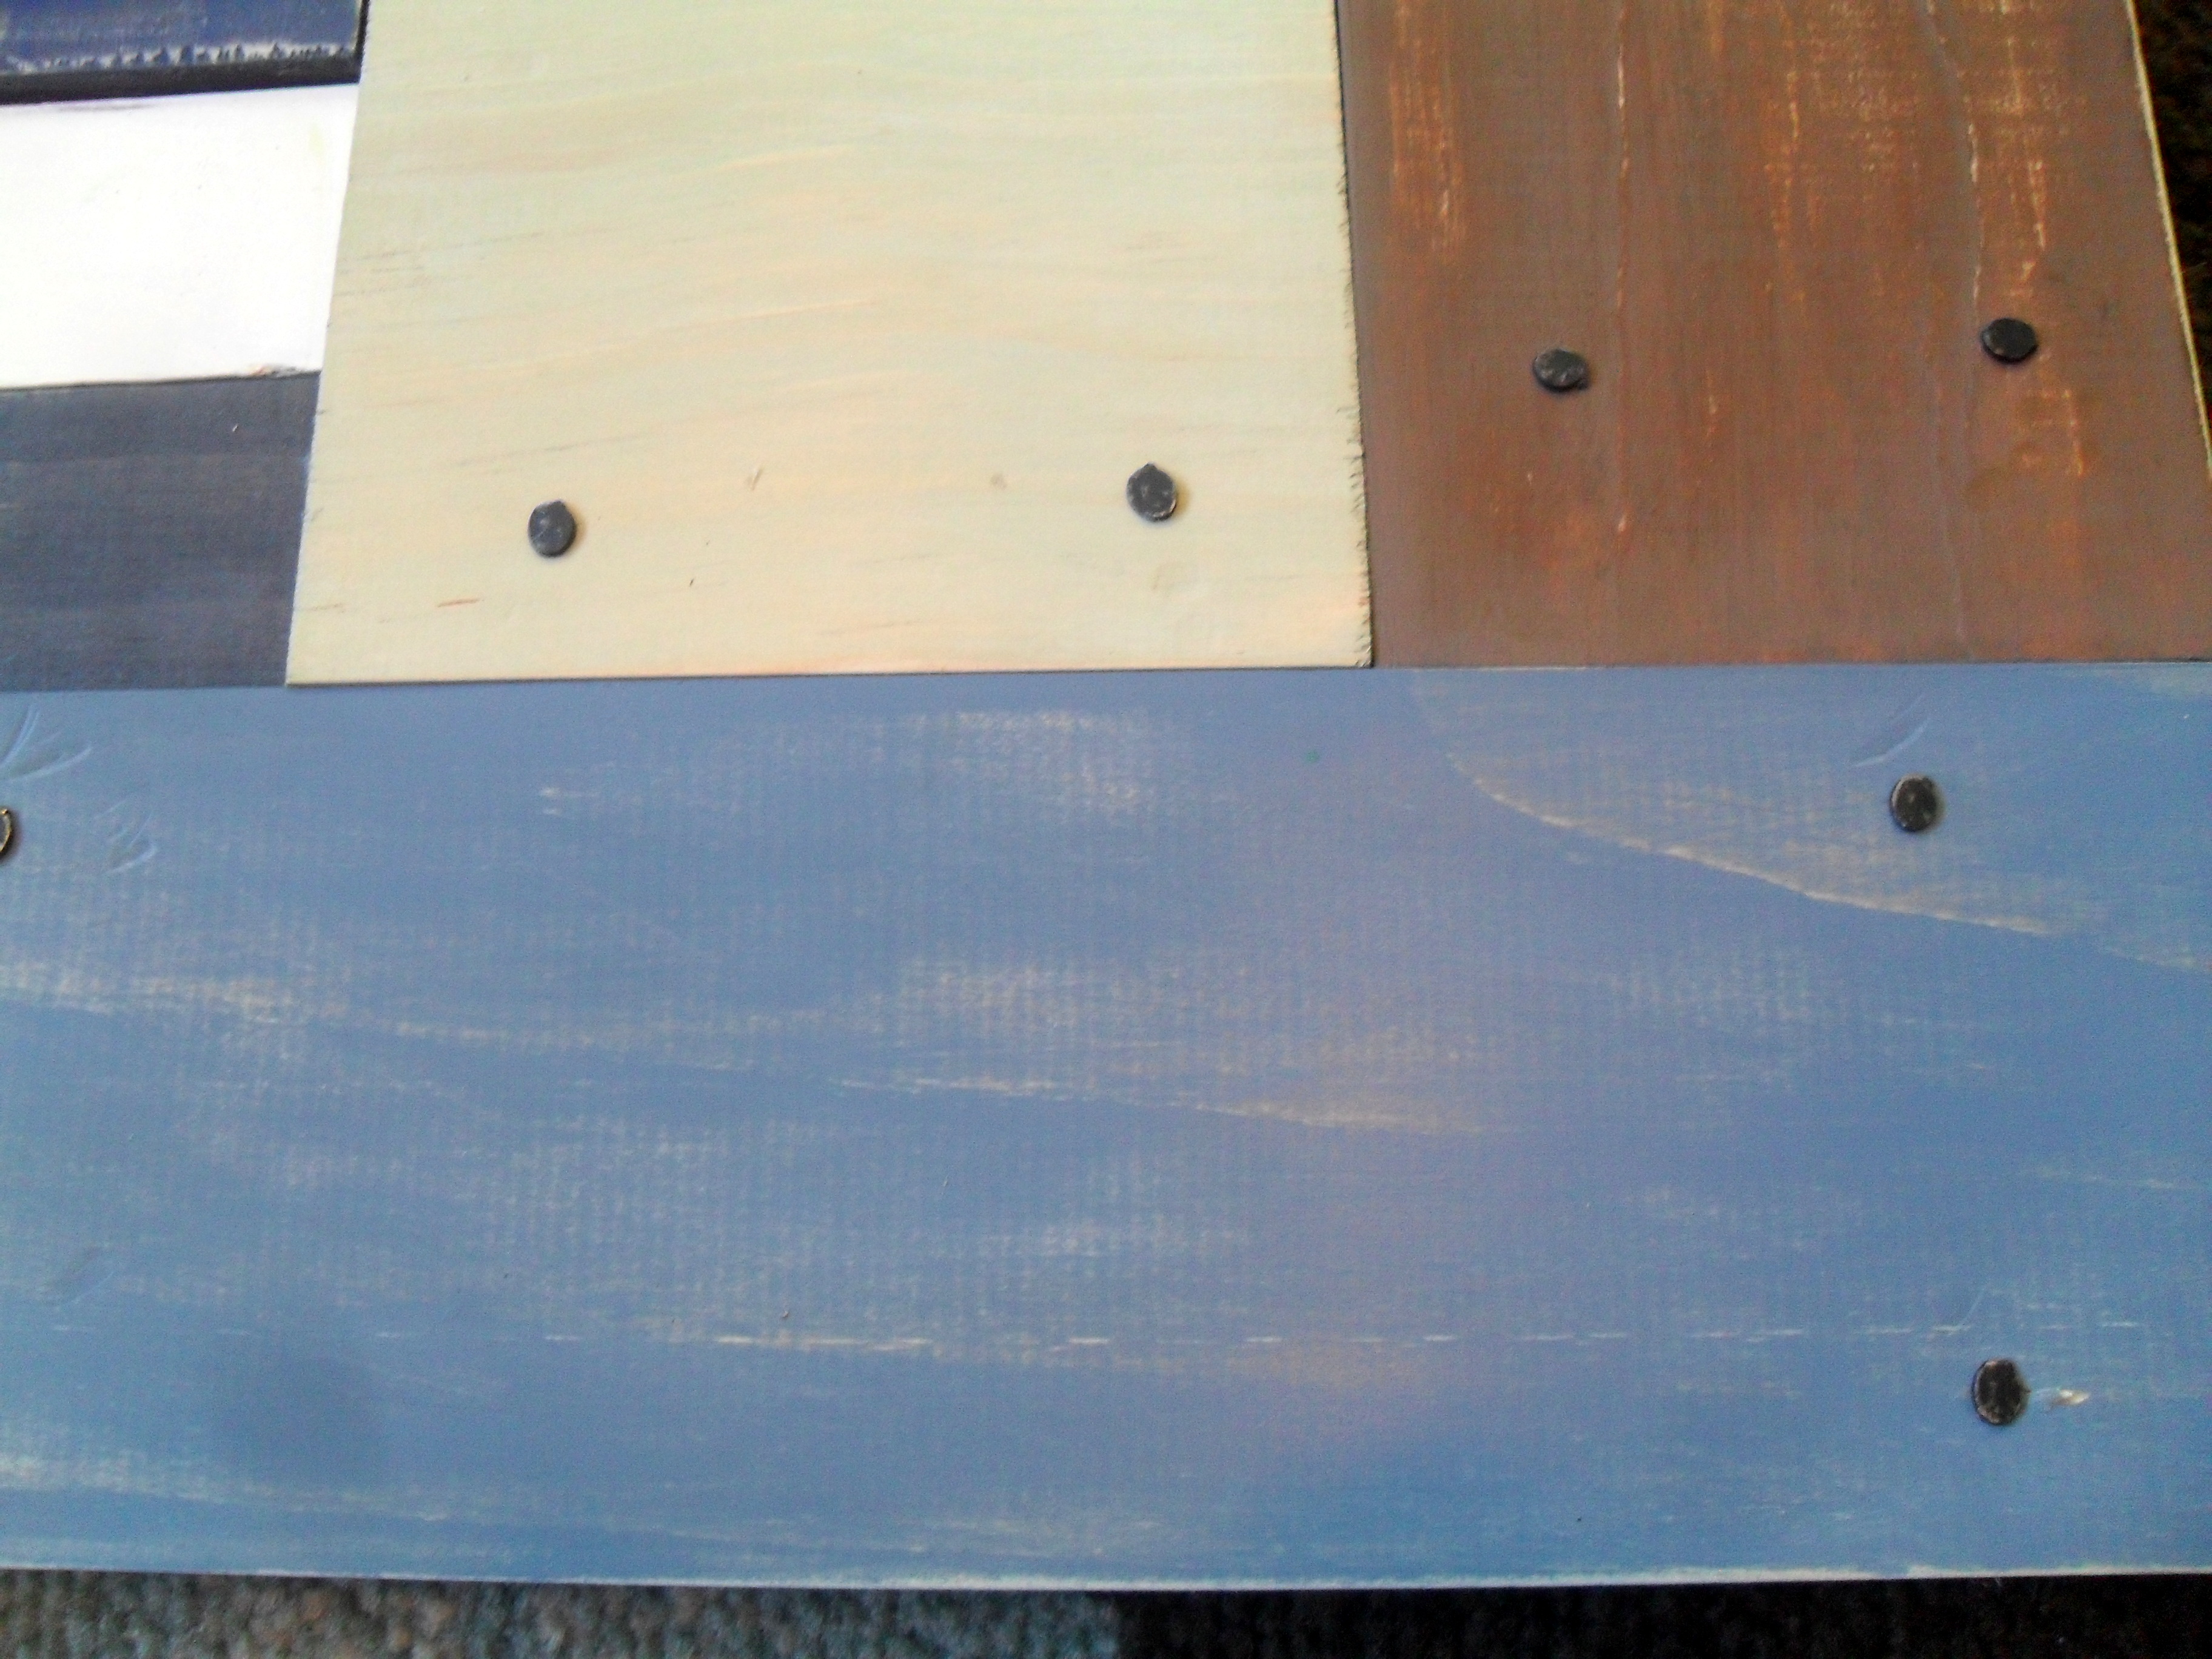
I lightly sanded the tack heads so they looked distress as well.
I’m not sure where I’m going to hang it
yet. I may add some trim around the edges. This was a FUN project.
Although I used a power saw to cut the pieces, it can be done with a
simple miter box.
This Pottery Barn knock-off project was a
great way to use up most of the scrap pieces of wood I had accumulated.
And my garage is a little bit cleaner now! :)


Subscribe to:
Posts (Atom)